(Spring Boot) org.springframework.boot:spring-boot-gradle-plugin:3.XX와 일치하는 변형이 없습니다.

'Import Getting Started Content' has encountered a problem.

NoMatchingConfigurationSelectionException: No matching variant of org.springframework.boot:spring-boot-gradle-plugin:3.0.4 was found. The consumer was configured to find a runtime of a library compatible with Java 11, packaged as a jar, and its dependencies declared externally, as well as attribute 'org.gradle.plugin.api-version' with value '7.6.1' but:
  - Variant 'apiElements' capability org.springframework.boot:spring-boot-gradle-plugin:3.0.4 declares a library, packaged as a jar, and its dependencies declared externally:
      - Incompatible because this component declares an API of a component compatible with Java 17 and the consumer needed a runtime of a component compatible with Java 11
      - Other compatible attribute:
          - Doesn't say anything about org.gradle.plugin.api-version (required '7.6.1')

...
새 프로젝트 개발을 위해 Spring Boot 프로젝트를 생성하는 동안 Eclipse에서 위의 오류가 발생했습니다. Spring Boot 3.0이 출시된 것을 Spring Blog에서 확인해보니 Spring Framework 6.0을 기반으로 하며 Java 17 이상이 필요하다고 합니다.
봄 | 집


코드 클라우드, 모든 클라우드 – 우리가 도와드리겠습니다. 플랫폼에 관계없이 서비스를 연결하고 확장하십시오.
spring.io
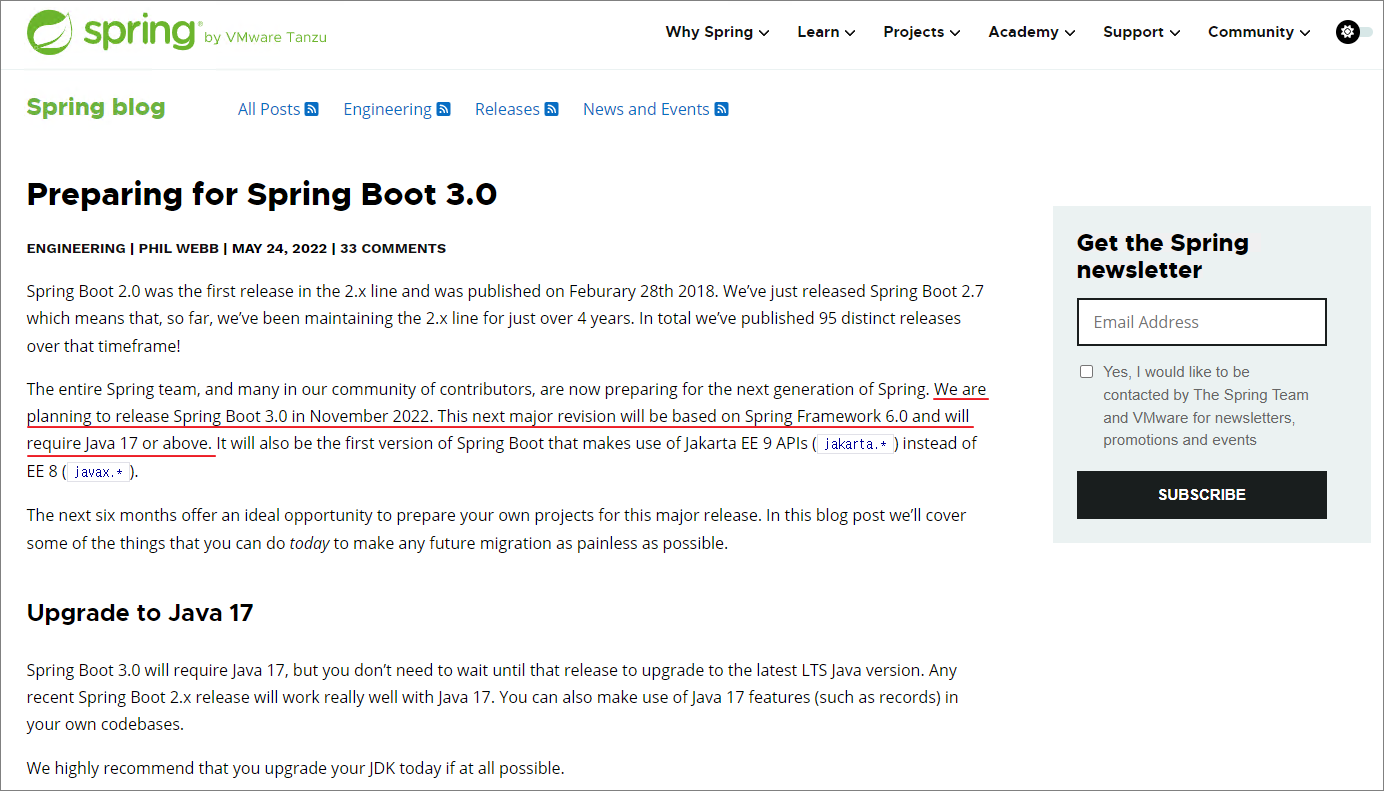
이 오류는 현재 Open JDK11을 사용하고 있기 때문에 발생합니다. Spring Boot 2를 기반으로 프로젝트를 생성할 수 있습니다. 다만, 향후 보안 문제로 인해 추후 업데이트 될 예정이므로 3rd 기반 프로젝트에 대한 버그 수정을 진행합니다.
- OpenJDK17 설치
아래 링크의 절차에 따라 Open JDK17을 설치하고 환경 변수를 등록합니다.
(Windows) Windows에 OpenJDK 17 설치
(Windows) Windows에 OpenJDK 17 설치 Windows에 OpenJDK 17을 설치하려면 아래 URL에 접속하여 OpenJDK 17 압축 파일을 다운로드합니다. Java Platform, Standard Edition 17 참조 구현 Java Platform, Standard Edition 1
jiurinie.tistory.com
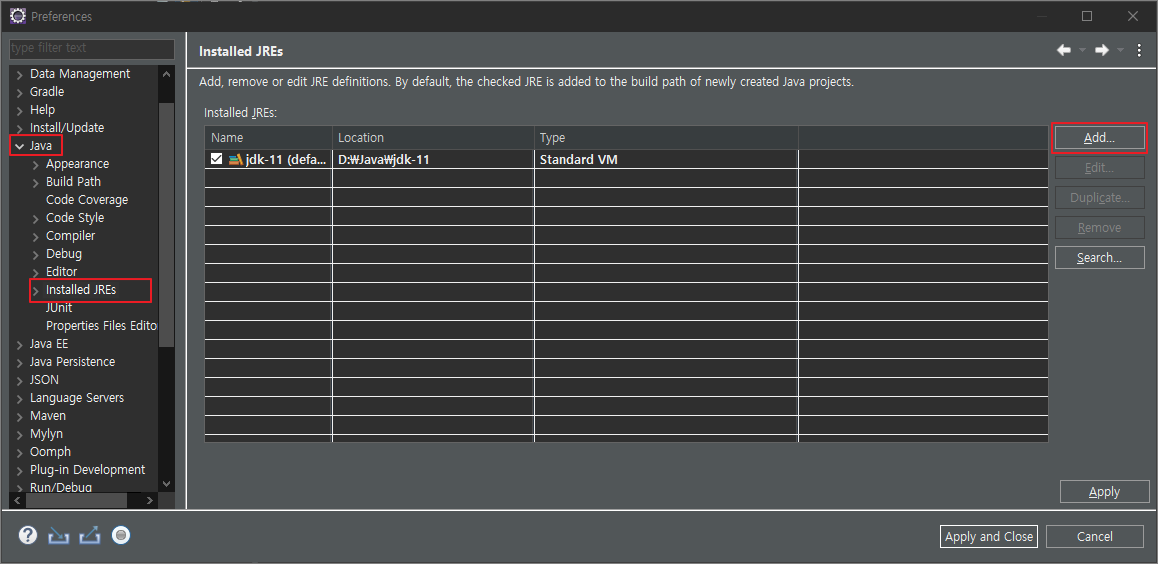
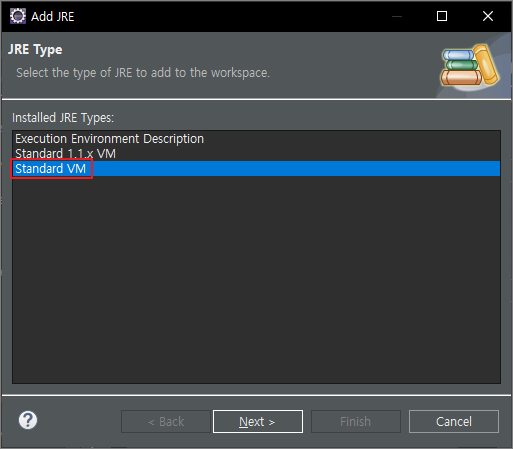
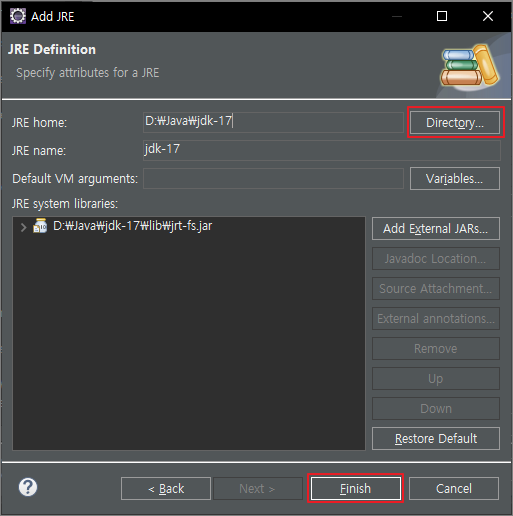
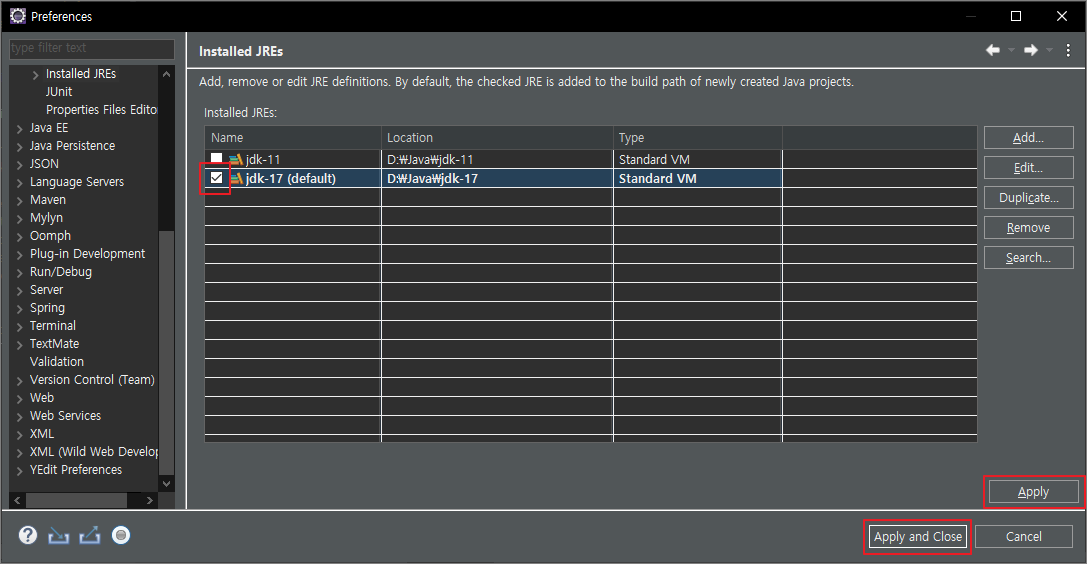
- Eclipse Java용으로 설치된 기본 JRE 설정
Window – Settings – Java – Installed JREs 창을 열고 추가를 클릭하여 아래 이미지의 절차에 따라 설치된 OpenJDK 17을 등록합니다.
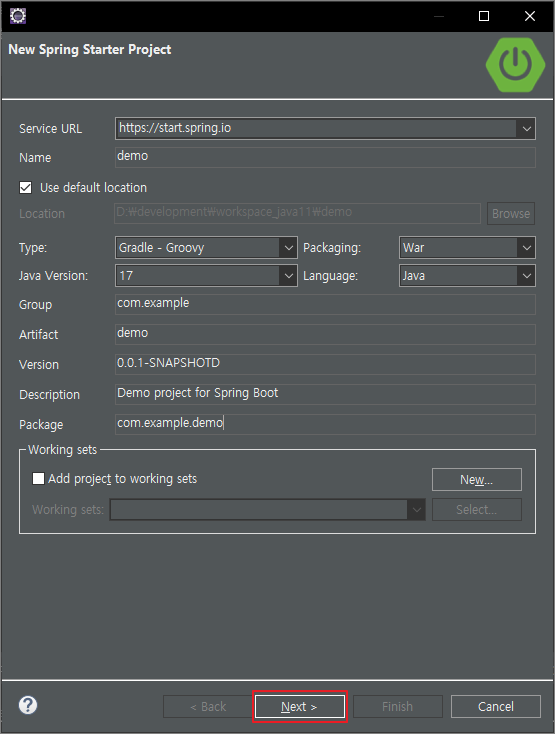
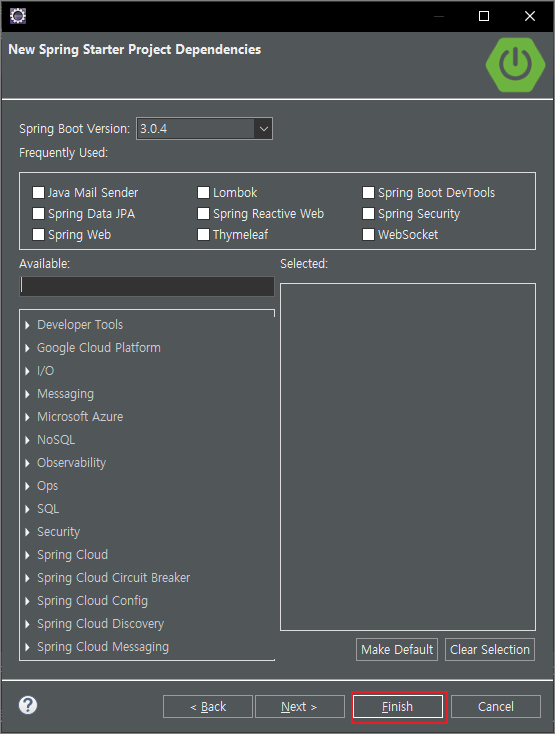
- 프로젝트 생성 확인
3.xx에서 최신 버전의 Spring Boot로 새 프로젝트를 생성한 후 계속하면 이전과 같은 오류 메시지가 나타나지 않고 Gradle 빌드가 성공적으로 실행됩니다.
> Task :nothing UP-TO-DATE

BUILD SUCCESSFUL in 444ms
Working Directory: D:\workspace\demo
Gradle user home: C:\Users\user\.gradle
Gradle Distribution: Gradle wrapper from target build
Gradle Version: 7.6.1
Java Home: D:\Java\jdk-17
- 영구 오류(eclipse.ini)
환경 변수와 Eclipse Installed JRE 설정을 17로 변경한 후에도 위의 오류가 계속 발생하면 eclipse.ini 파일을 확인해야 합니다. eclipse를 마우스 오른쪽 버튼으로 클릭하고 속성을 확인하면 대상 항목에서 위치를 찾을 수 있습니다.파일 탐색기를 열고 해당 위치로 이동하여 eclipse.ini 파일에서 vm 항목을 확인하십시오.
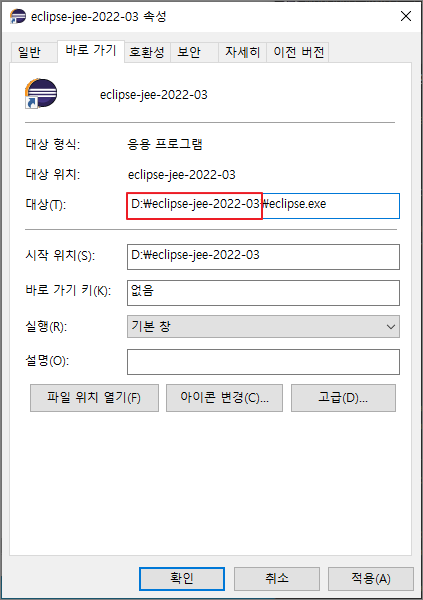
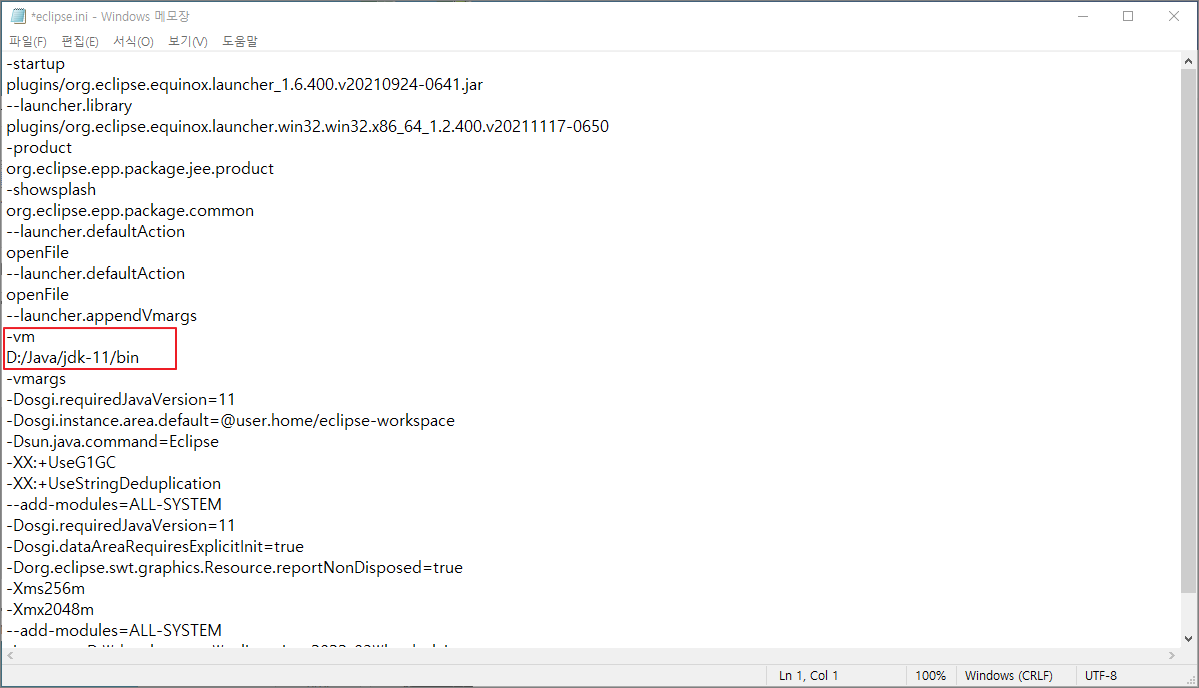
위와 같이 -vm 옵션으로 JDK 버전을 지정하면 가상 머신이 11에서 실행되기 때문에 3rd vs. Spring Boot를 생성할 수 없습니다. 따라서 -vm 옵션의 해당 값을 삭제하거나 새로 추가된 jdk-17로 변경해야 합니다.
# 삭제 또는 jdk17로 변경

#-vm
#D:/Java/jdk-11/bin

-vm
D:/Java/jdk-17/bin